Monday 15 April 2013

Finally finished

My girlfriend came through with the replacement elbow joint and the final pieces were cut and glued together. 


Rear of Steampunk Rifle


Friday 12 April 2013

Oh crap...

Last night was a total disaster! I've completely lost a vital component! One of the copper right angle joints has gone missing. I've either put it somewhere or one of my pesky kids has nicked it!
It was totally my fault, I had it the night before and put it somewhere. Still, My girlfriend has picked me up a replacement today so I’ve got a busy final night tonight.
Last night, I did a bit of cosmetic work, nailing some thin strips of soft leather to the grip and to the stock where the forward hand would go, and glued the sight onto the sight assembly.
Tonight I need to cut and fix the side pipe assembly and it’s done. I’m confident it will get done.
One final cosmetic detail that was pointed out by my girlfriend which I think is exactly right. The leather strips on the grip look too “new”, I’l going to dirty them up with either boot polish, ink or just plain old dirt from the garden.
No pictures I’m afraid, so the next post will be the finished article!

Thursday 11 April 2013

Last nights progress


Last night I cut the leather straps (or as I’ve now found, imitation leather...still does the job though) and screwed them to the stock to hold the pressure vessel in place. The glue did a pretty good of holding it securely but the straps look the part.


Before I attached the barrel, I took the copper sheet that I had cut to cover the trigger guard and simply nailed it in place on the stock. It is quite thin copper and it nailed fairly easily. It covers the hole really well and I just need to paint the trigger assembly with copper paint.


I tried to drill holes in the copper straps for the barrel but it just wasn’t happening with the Dremel. So, I marked where I wanted the holes to be and just hammered a nail through the copper. I then marked the stock and drilled a small guide hole for each screw on both sides of the stock. The barrel was glued with hot glue to the stock and quickly secured with the brass straps.


Tonight I’m going to concentrate on the side pipe assembly, that’s the tricky bit. That is easily an evening’s work (you may have guessed I take my time with this sort of stuff!) as there is some accurate measuring to do and cutting it all to size. Once this part is done, I can glue the sight in place and once that is dry, cover any glued areas with paint. Then it’s just cosmetics.

Wednesday 10 April 2013

In progress - three nights remaining!

My amazing girlfriend bought me a hot glue gun yesterday which, thanks to a tight deadline, is proving invaluable already! Thanks Gorgeous!
Progress last night was in little bits. I stained the rifle stock, two coats, which looks ok. It could’ve been a lot better but I couldn’t get a smooth enough sanded finish on the bottom and rear of the stock so it looks a bit rough and grainy in places. The sides look great and I’m sure that once other components are fixed in place it will look ok.
I used the hot glue gun to glue the snug fitting trigger piece in place (at the second attempt! I didn’t realize that the glue set that quickly!) and I then cut a thin piece of copper sheet to fit over the trigger guard and fix to the stock to neaten up the join.
The 1m long barrel was glued to the sight assembly and a 15mm-22mm copper pipe reducer/widener (depending on which way around you look at it) was also glued to the other end for a cool little detail. So all in all, the barrel length from stock end to tip is now around 1.2m!
Finally, the pressure vessel was glued in place and left to dry overnight. I’m not confident that there is enough contact between the vessel and the stock for a good bond but it will also have leather straps so, fingers crossed it should be ok. I’m going to screw the straps in place tonight first thing.
The next job will be attaching the trigger cover, this will need guide holes drilling with a tiny drill bit and nailing down.
Once that’s done, the barrel will be hot glued to the stock and the brass straps partly drilled to the stock and screwed down.

That’s what I want to achieve tonight at least. Ideally, I want to also cut the side barrel parts too. I’ve found a screw hook to hold up the side barrel but I don’t want to do too much and risk knocking anything that’s still drying.

Apologies for the lack of photos today, I’ll update tomorrow.

Tuesday 9 April 2013

Ok, just a quick update...

Last night I cut a hole for the trigger to sit in. It was initially tricky to get the shape of the hole cut due to it being in quite an awkward space next to the grip. A Dremel disc was used to cut the outline and then once the hole started to take shape I had a chance to use my Dremel router attachment for the first time. The trigger was cut from the toy pistol I was initially going to use for the Boba Fett replica gun project. However, the two sides of the trigger didn’t stay together very well so I had to substitute a working/moving trigger in order for the bits to stay together. I basically filled the inside with araldite so it’s now pretty solid. The rough edge around the edge of the hole will be covered with a thin piece of copper sheet and glued/nailed in place. Sorry its a poor picture..


Time is running out...I only have four evenings left to complete it before my buddies, Drew, birthday BBQ on Saturday. Everything is pretty much done, it’s just assembly now.
·         I’ll stain the stock tonight after a little sanding.
·         The sight and pressure vessel need another wash with green ink to make it look aged and then a final dry brush with a darker copper colour
·         There are a couple more cuts of copper pipe to make to finish the side pipe assembly that attaches to the pressure vessel
·         Attach the barrel to the sight assembly and glue it to the stock.
·         Strengthen the barrel bond by gluing and screwing the brass straps to the stock
·         Attach the pressure vessel with glue and further strengthen this bond with screwed down leather straps
·         Attach the final parts of the side pipe to the pressure vessel
·         Attach the sight with araldite and cover the glue with copper paint
·         A few final cosmetic details, thin leather straps to the stock grip etc, if there is time.

Monday 8 April 2013

Future plans!

I've decide to add some interviews with fellow modelers and creative types to my blog. I’ve got lots of friends still in the industry and lots that just make stuff for the love of it. I plan to contact some of them and ask for hints and tips, inspiration and chat about ideas. I’m personally pretty excited by the idea and I’ve had some of the guys agree to talking about their passion. Obviously I’m still busy with my current project so the interviews will be put on the back burner for a couple of weeks but I’m still looking forward to it!

Friday 5 April 2013

The Steampunk Rifle next steps

Ok, so I’ve been a bit busy at work and family stuff but I've gotten started again. Due to the nature of the work and that the project is worked on in the evening, use of power tools has been limited due to the fact I don't want to disturb my kids once they are in bed and some things need time to dry/set.
I gave the wood a quick sand down and I’m happy that the recycled wood that had been in the garden for years cleans up ok and should look good once stained. I've got some wood stain left over from doing our mantle piece so I’ll use that on the finished stock. Speaking of which, I cut it out using a jigsaw. The only downer is that the wood is very slightly warped, which is evident when you look along the bottom of it. It’s going to be too time consuming to sort it out, it’s not noticeable unless you are looking at it but I have a plan to hide it.
Here it is.

Steampunk rifle stock shape

You can see a couple of the features already. As well as the groove along the top to house the barrel, I used my Dremel to carve a neater end at the front and rear of the stock. In hindsight, the carved groove along the whole length was a waste of time and effort. Not only is it too big (oh dear!) but it would’ve been easier to use the Dremel tool to just sand a neat groove along the stock. But you live and learn. Here is the groove for the barrel.


You can see the notch I sanded a few inches in on the right side. This is for part of the piping connected to the pressure vessel at the front of the gun.


Pressure vessel space


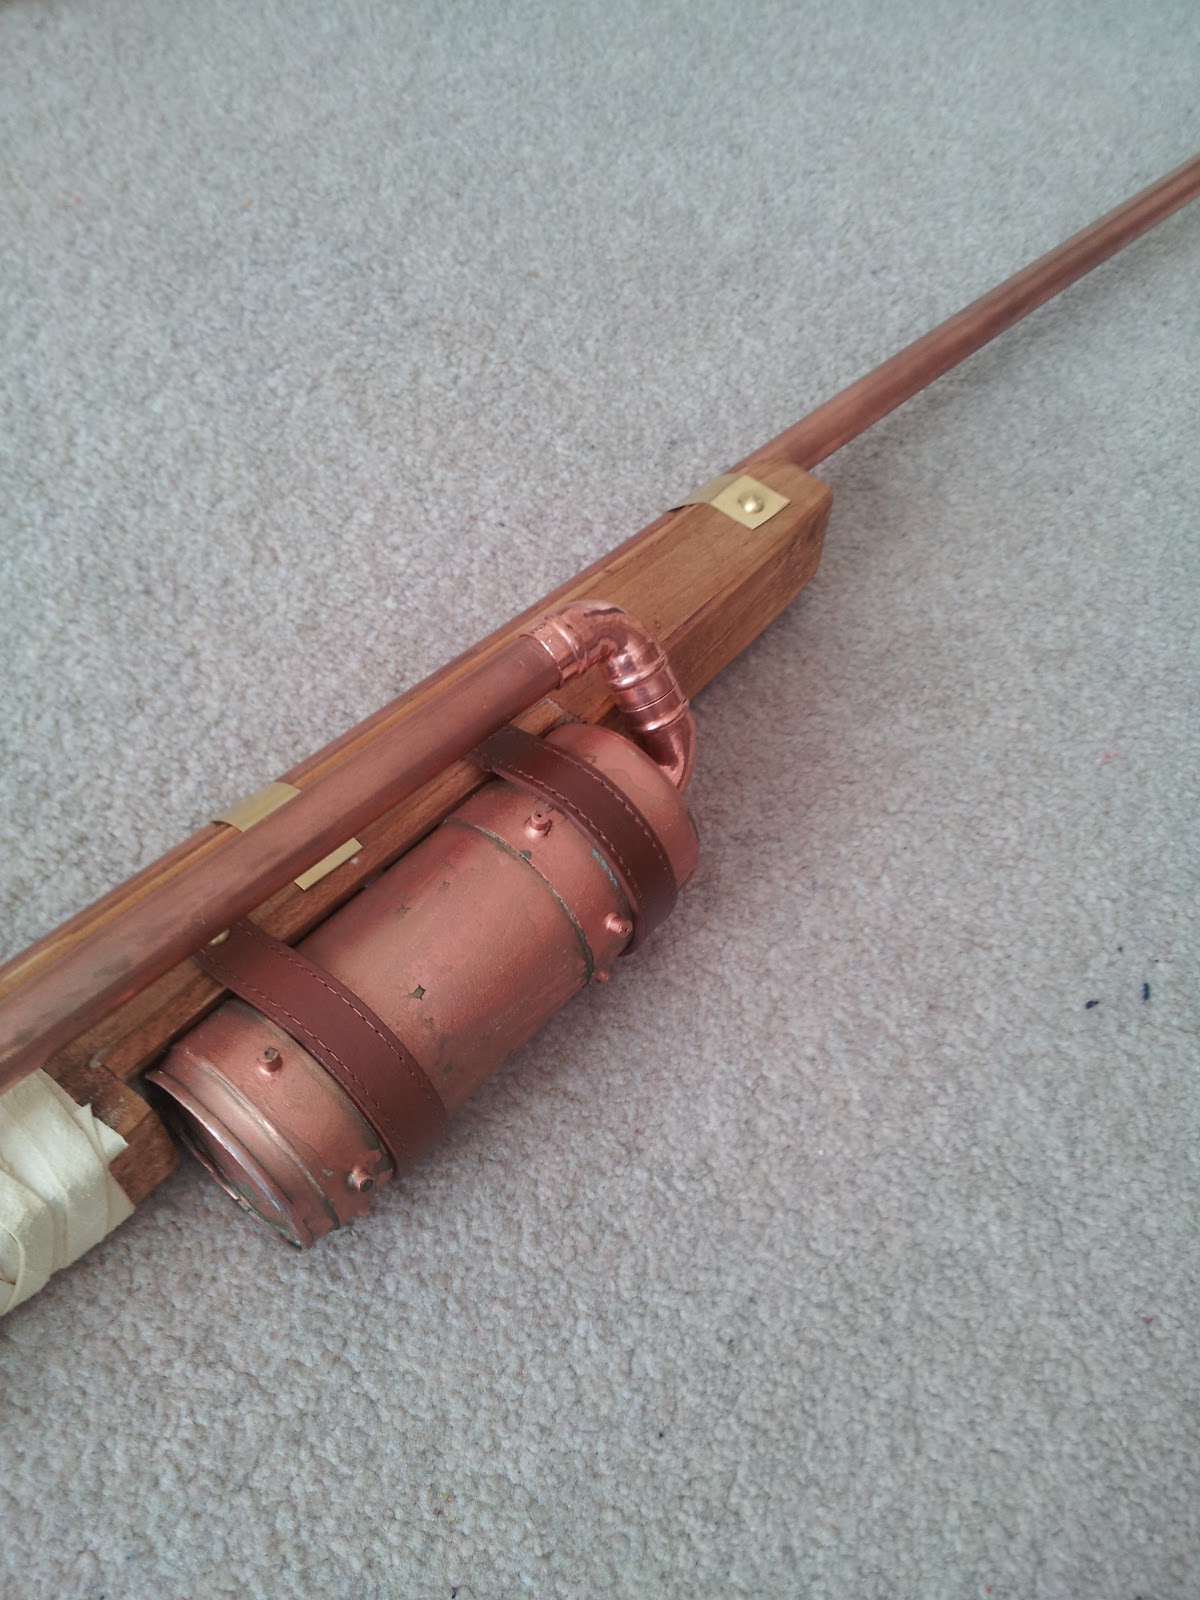
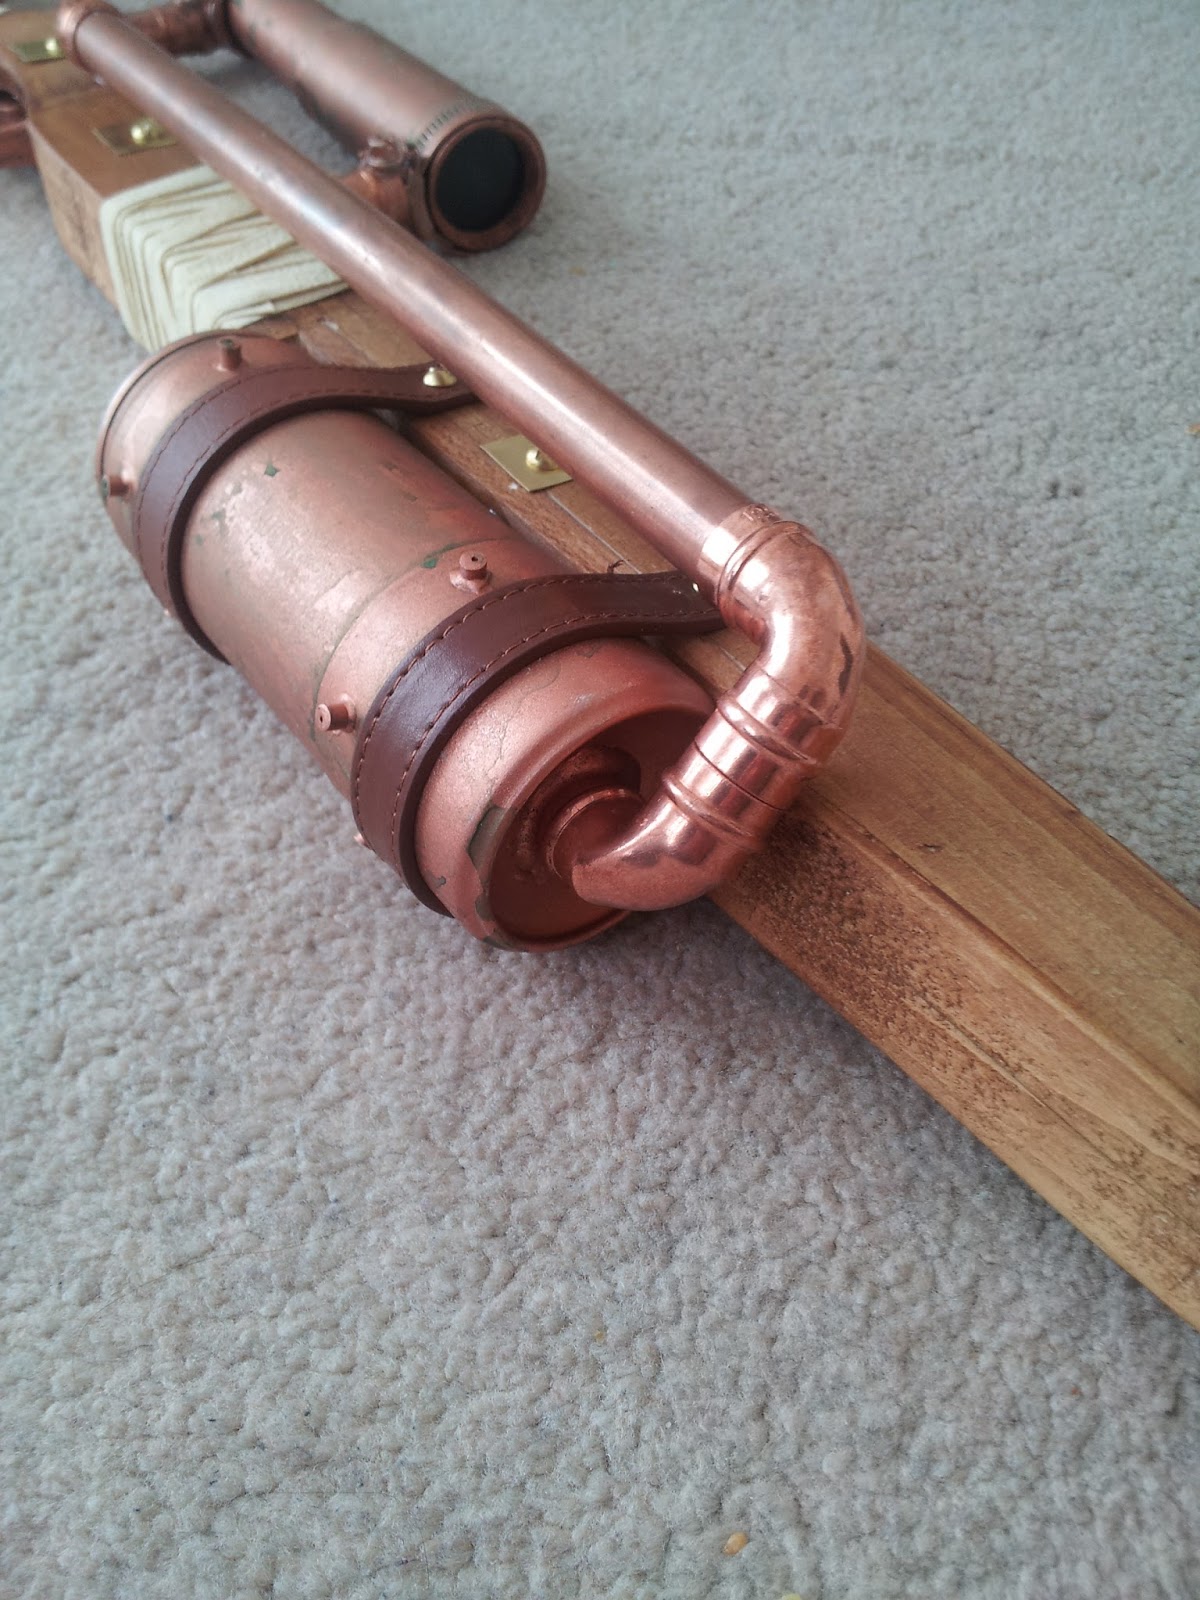
The pressure vessel is simply an empty drinks can filled with plaster for strength. I’ve glued some card to it and have some small plastic studs to glue on too. Once painted metallic copper, it should do the job. I’m also looking at green and black ink washes to age the appearance a little.


For the sight, which will also be painted, I bought a childs toy telescope from eBay for a couple of quid (I narrowly lost out on an actual brass telescope, which would’ve been awesome but I wanted to keep costs down). A couple of hose clips will be used to connect the site to the barrel assembly.


Rifle scope


This will be the rear of the barrel. It needs a pipe end cap on it and the barrel will fit into the other end. There is a groove cut with the Dremel already which the screw part of the sight hose clip will sit in. The other upright part of the assembly still needs a groove cutting into it. The middle part fits into the side groove cut on the barrel stock, which you can see here.


The part on the side will have an extension to the pipe that runs along the stock to connect to the pressure vessel at the front.

There is still a fair bit to do. I need to cut lengths of brass strip; the Dremel is good for this, to use to strap the barrel down. This is for strength as well as aesthetic purposes. I don’t think glue would be strong enough on its own so brass straps will be screwed to the stock in three or four places to secure it. Stuff needs painting with enamel paint and aged, and additional lengths of pipe need to be cut to secure the joints together, again thanks to the Dremel. I have a toy pistol which I’ll remove the trigger and guard from and insert into the stock. A few additional cosmetic things to think about but I’ll record them as I do them.

That’s it for now. Busy weekend ahead.